Once you get going
I can be contacted at E-mail address:-
![]()
Once you get goingI can be contacted at E-mail address:-
|
|
|
Now you have generated the working 'Base Network', there are a great number of facilities available to you within the program which can be explored. This is a starting point with Creating, placing, moving and adding extra Units.
Creating and placing Extra Units: Using Google Earth to name and place Units:
Creating and placing Extra Units:
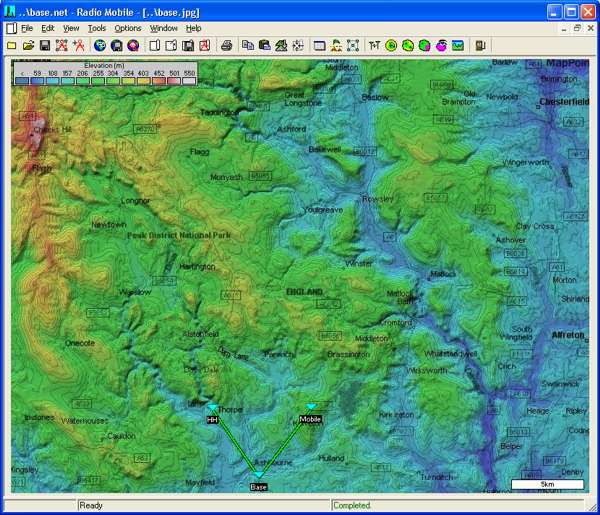
This is the basic map screen obtained so far from my 'Base Network':
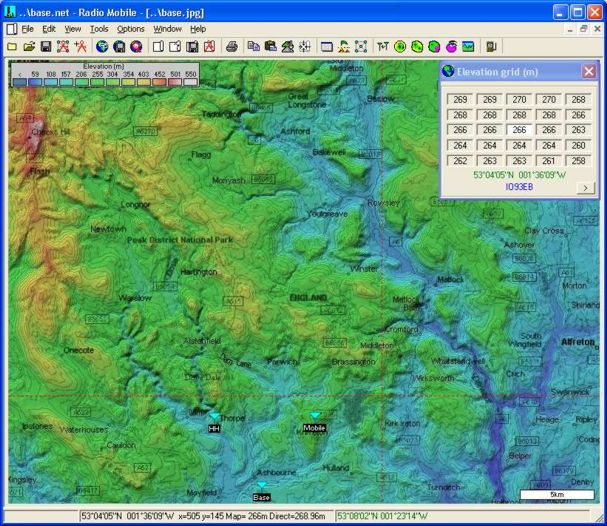
A left click on the map will produce a red cross wire cursor at the pointer position and an elevation grid showing the height profile around the cursor position. The cursor can be moved by using the keyboard direction arrow buttons or by clicking grid squares in the elevation grid window. This is the position where the new Unit will be placed.
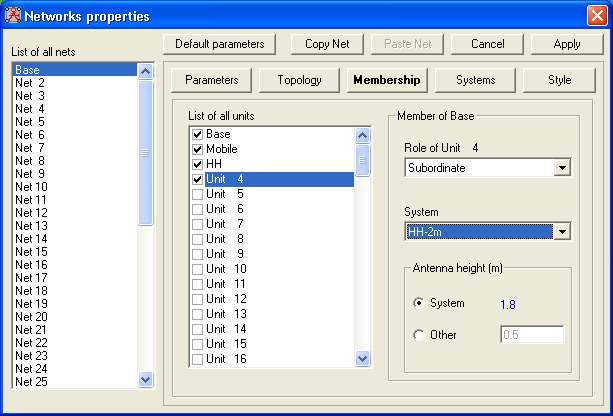
If you then open Network Properties from File/Network Properties - or click the
and select 'Membership' this pane will open.
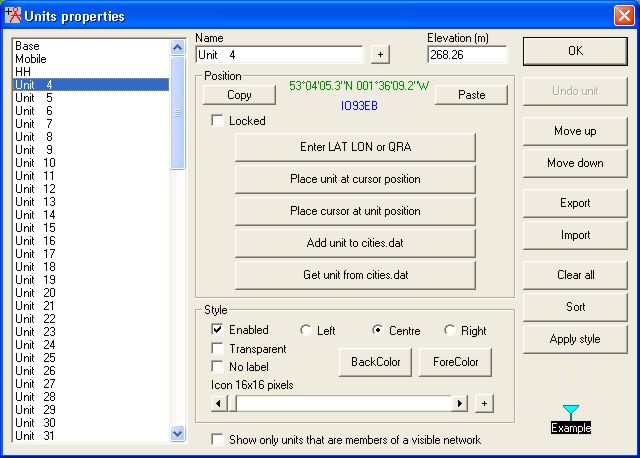
Select Unit 4 and allocate it to the HH-2m System as a subordinate, second, hand held unit. Then click 'Apply' to close the window and open the Unit Properties pane from File/Unit Properties,
or by a click on the
Select Unit 4, and a click on 'Place Unit at cursor position' will place the Unit at the elevation and location of the cursor. Unit 4 can then be renamed to HH-2 to define it on the map as below. Then click 'Apply' to close the pane.
Note that a Unit has to be enabled in both 'Network Properties' and 'Unit Properties' to be visible on a map!
Using Google Earth to name and place Units: Where you have a named 'place mark' generated on a Google Earth picture, its location and name can be saved to the clipboard by a mouse 'right click' and selecting 'Copy'. Opening the Unit properties pane above in Radio Mobile, selecting an unused Unit location followed by a click on the 'Position - Paste' button, will enter the Unit location coordinates and name into the Unit list. To make the Unit active, it will be necessary to open the Network Properties pane to enable and allocate the Unit a Radio Operating System.
Moving Units To quickly move any Unit on the map area, first left-click where you wish the Unit to be placed to generate the red crosswire cursor, followed by a right-click on the Unit. You will then be prompted as to if you wish to move the Unit to the Cursor position. Alternately, opening Unit Properties as above enables any Unit to be selected and its location entered as Lat/Long or QRA locator.
Click here for the
and here to find how to perform a
Wish to change the Map Location
to your own? See
This page is available in .pdf format here
Please keep checking back for updates/additions.
© Copyright G3TVU 26th October 2017
|
 icon above the map -
 icon.
icon.