Find Best Sites
I can be contacted at E-mail address:-
![]()
Find Best SitesI can be contacted at E-mail address:-
|
|
|
In a Network
There are two methods of Finding best sites, this first in a Network, and the second method using Waypoints.
A click on an image on the page will take you to a higher resolution picture, 'Up' or 'Back' to return.
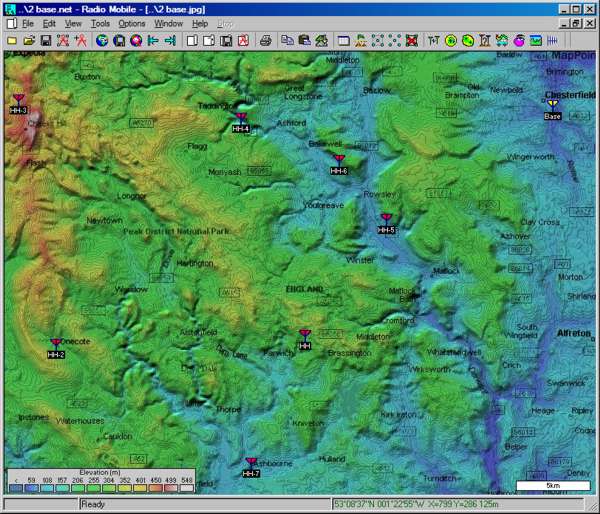
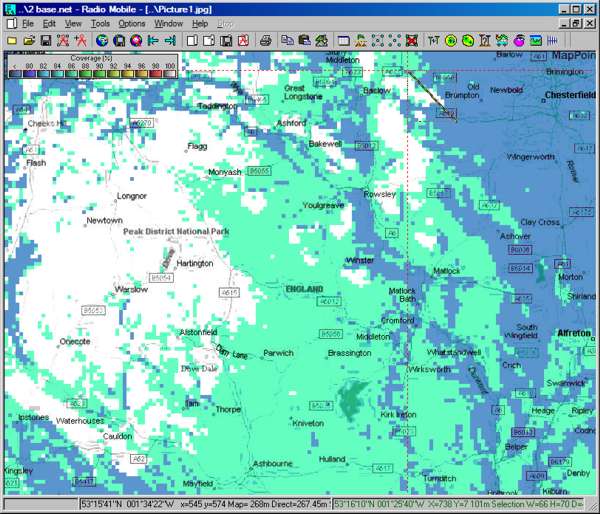
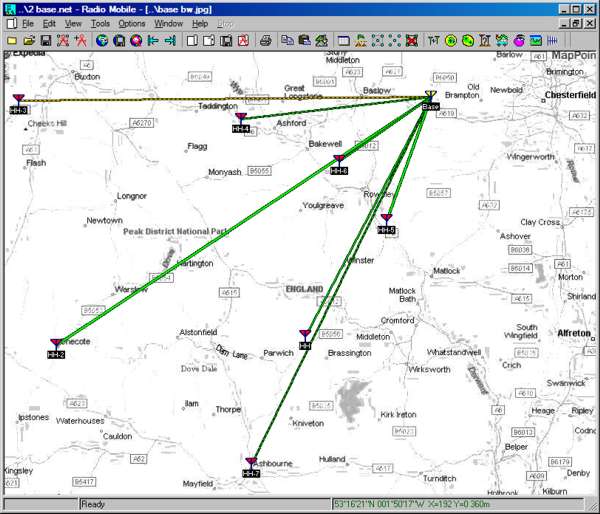
The first method of Finding the Best Site for a station in a Network can be demonstrated on my modified 'Base Network' map shown below. This Network consists of 7 Hand Held Units plus one Base Unit which are required to have 2-way communication.
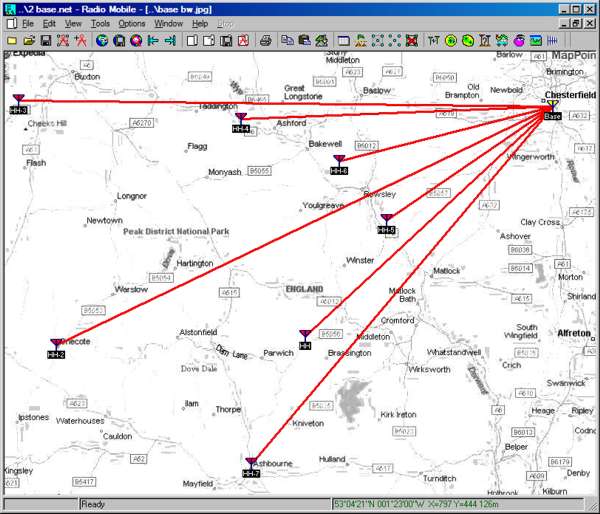
The Base Unit Home location is to the North East of the map, and a plot of the network links over the greyscale (B/W) road map shows that there are no communication paths between the Base and any Hand Held Unit.
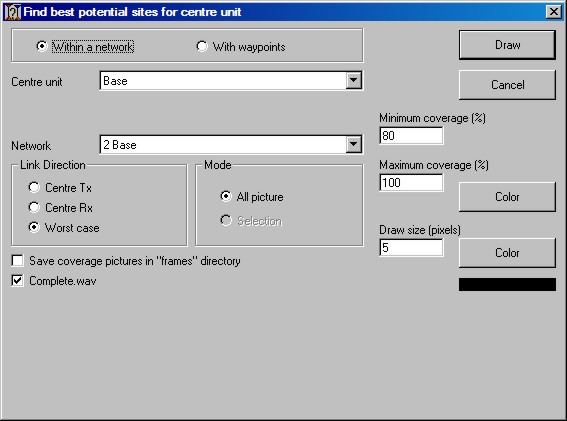
The first stage in finding the best location for the Base Unit is to open the 'Find Best Sites' pane by pressing F5, clicking on the Toolbar icon
or by opening 'Tools/Radio Coverage/Find Best Sites', which produces the pane below:
In this pane the centre Unit and Network are defined, plus the maximum and minimum coverage % range to be plotted, and Draw area sample size in pixels to be displayed. Also, as the best site locations for two way communication between the HH and Base Units are required, the 'Worst Case' Link Direction has been selected.
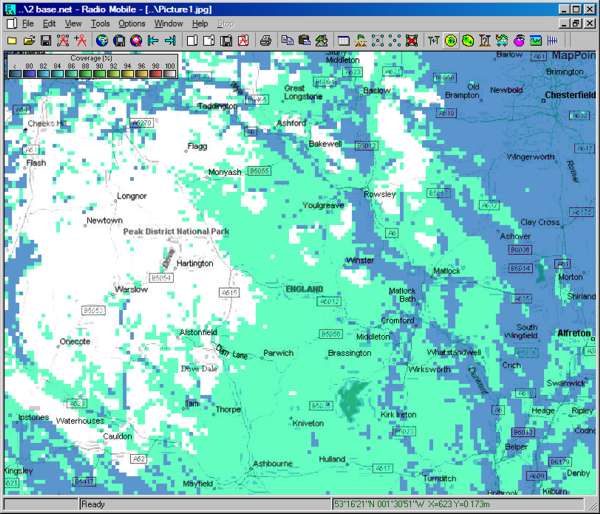
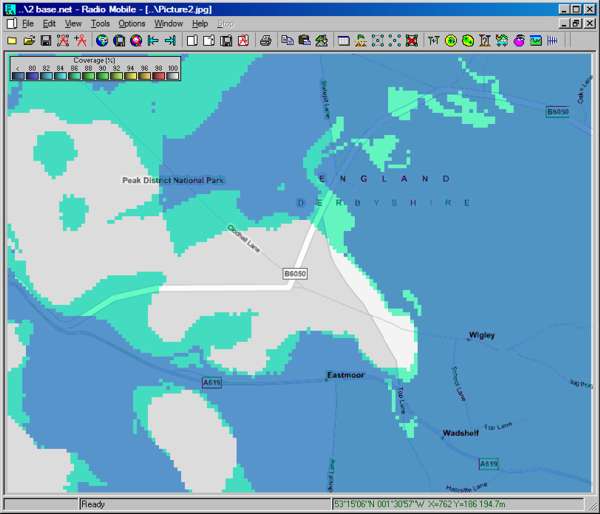
The following 80% to 100% coverage plot was performed over the B/W road map - then when prompted - 'Kept in New Picture'.
One additional requirement was that the Base Unit was to be placed near to its Home location, so the area below was selected with a 'Left click and Drag' to generate the marquee box shown.
A 'Right Click' in the marquee box prompts you to 'Create a Zoomed picture from the selection' which generates a new small area picture as below.
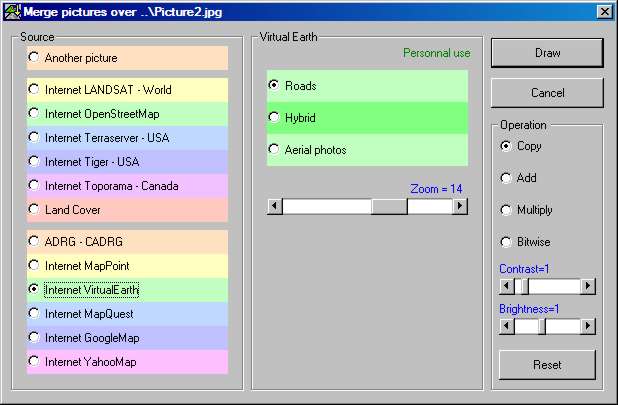
This picture is very low resolution, but defines a map area which can be used with the Merge pane below to generate a high resolution picture of the area. Note that the operation is set to 'Copy' so that the merged picture can be 'Kept in the actual picture' to replace the low resolution version. To open the Merge pane use the F7 key, click on the toolbar icon,
or select 'Edit/Merge Pictures'
(If you don't see all the Merge source options - see this Important Note)
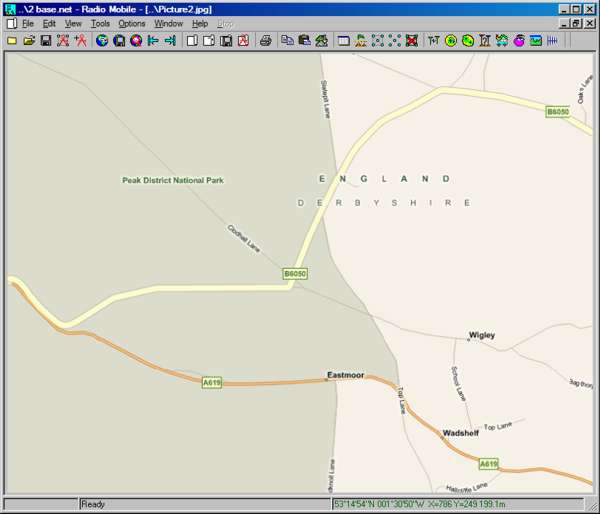
The 'Merge/Keep in picture' produces this picture which now contains high resolution data of the area covered:
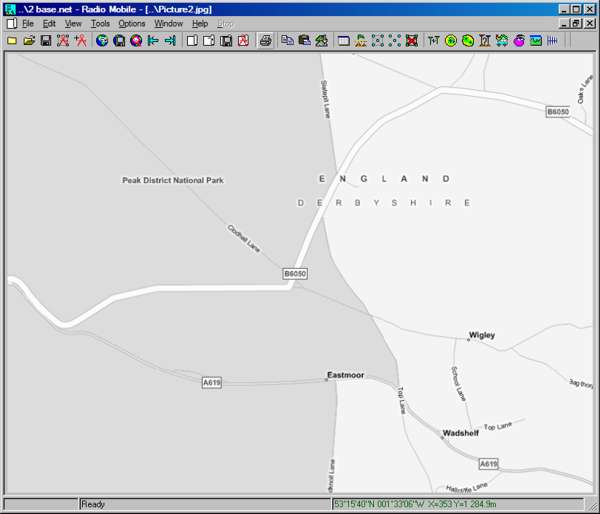
To make full use of the signal coverage colours, this picture can be forced to grey scale using the 'Edit/Force greyscale' command then keeping in the picture to produce:
A 'Find Best Sites' plot can now be repeated on the whole of this zoomed picture, to see if a location with access can be found:
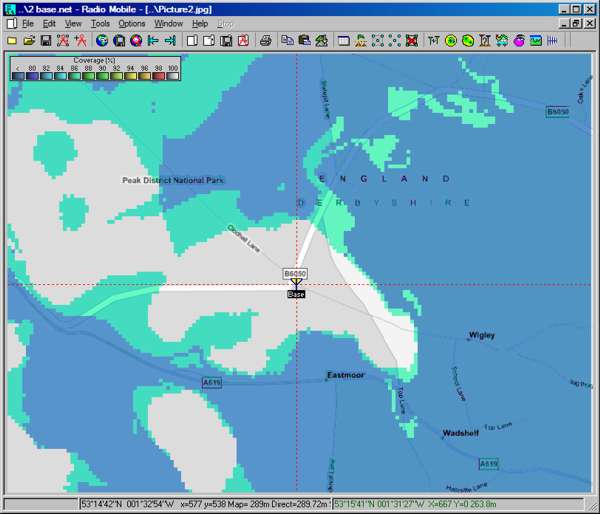
Then by clicking on a location on the map to produce the cursor cross wires - opening Unit Properties - selecting the Base Unit - and then 'Place unit at the cursor position', the following screen will be seen with the Base Unit located at the cross roads:
Finally, selecting the 'Base bw' window and clicking on the toolbar Network icon, or using 'View/Show Networks/All', the new radio links can be shown. Individual link performance being checked with the 'Radio Link' pane.
Note that the Land foliage losses can also be incorporated in the plots to find how, visit:
Click here for the second method of Finding Best Sites for Route coverage utilising Waypoints.
This page is available in .pdf format here
Please keep checking back for updates/additions.
© Copyright G3TVU 26th October 2017
|